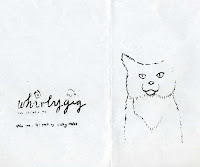
So i drew the designs onto some acetate (clear plastic pockets for folders as acetate is expensive) and burnt them onto my screen. now those of you who have done professionalish screen printing at University or at workshops will be wondering how i did this.
it's called improvisation. and thank god for the internet.
I found some videos off of YouTube, that i cant find again, and a looong time ago i spoke to this awesome man in Whitstable who's wife was exhibiting on the sea front, giving out little wooden houses, and asking you to find them a new home. I think he may have run the Print Block on Whitstable Harbour. and his name was unusual. But yes. Thanks to him, and his wise words.
This was my set up. Excuse the state of my room, but i was too excited about all of this to tidy it up. simple as that its priorities.
So its a '500 watt' flood light (£12.99 from wicks) a clothes horse, some black fabric, a pillow, and a sheet of glass to 1, hold your transparency in place, and 2, keep it flat.
The good thing about the clothes horse is that it has variable height.
The bad thing abot the clothes horse is that, it can melt under the temperatures caused by the light.
Trial and error was needed for exposure times. it ended up being middle rung for roughtly 10 minutes. i did 5 minutes on this one with that height and it was under exposed, and washed out, then, 15 for a bigger one and over exposed it. so it really will depend. I advice leaving pleanty of time before you do this. it's not tight deadline stuff.
here are just some lovely close ups. everyone loves a close up.
Washing the screen is obviously next. dont do this in your rented perfectly white bathroom. it stains like a mother, using the hose outside is probably best. if you can handle the temperatures atm.
The fabric i've used hasnt given me great resolution. its a wee bit pixelated. but i kind of like that?
After it had dried it looked like this. The glass i used was a tiny buit small, but i thought id wing it, it left some lines, but i painted that in with my left over emulsion, exposed it again and it was fine.
...Then yeh, i printed it.
because it was a tiny screen, my squeegee isn't small enough, i used a piece of grey board to pull the ink through. it worked perfectly fine? i presume it wouldnt on a larger scale. which is why i invested in a larger Squeegee ( about £2 per Inch? - 'Wicked printing Stuff' - they have a lame name and website, but they are in Kent, do organic screen wash and non plastisol inks AND let me collect my order)
 wasn't a great success to be completely honest. (wow my writing skills are superb, i'd be amazed if you're still reading this by now) some of the thinner lines didnt expose very well. (something to remember for next time) and the pixelation type effect did start to look a little unprofessional. but i show you and you can decide.
My favourite thing out of all of this, is feeling like a real 'artist'/creative person, having prints hanging up in my room. It's a little sad, but it got me through the day. Screen printing is stressful at the best of times, let alone completely self sourced and in your tiny room.
good luck if you attempt it and let me know, i'd love to see what you come out with.


Nice work! Looks great =D
ReplyDeleteTotally hot. You're right about 'feeling artistic', having so many things you can see and touch and hold littering yr room must feel good - I much prefer printed photos to pictures on a screen.
ReplyDeleteMagic! Looks like a lot of fun - I'm looking forward to seeing the finished things. Nice to see a pic of your new habitat, too. :D
ReplyDelete